Thursday, December 3, 2009

I Bit the Burlap Bullet

So, everyone in the online crafting world has been going nuts over burlap. I've refrained from doing so for quite some time...but alas, Christmas got the better of me. My mom gave me a huge pile of pillow forms last time I was home. I also acquired some really cute felt shapes from various places like the Dollar Tree and Target. The fabric that brought all these things together nicely was (you guessed it!) burlap. These were super simple to make, and I have to admit, they turned out great!
Some (mis) guidance:

For each pillow, I just measured one side of the pillow form (from side seam to side seam) and added 1/2 inch total (for 1/4 seam allowance on each side) all the way around. Then I cut one square for the front using that measurement. (Ex. the pillow form measures 15 inches, so I cut a square 15 1/2 x 15 1/2 inches.)

For the back, I did an envelope style so I could change out the cover if I wanted. For these pieces, I kinda eyeballed it, but it basically ended up being the same measurements as the front plus two inches or so on one side only. (in our example, this would be 15 1/2 inches tall by 17 1/2 inches wide.) Then I cut this rectangle in half, starting on one of the wider sides (17 1/2 inches) Then I folded under a 1/4 inch on each half (where you just cut the two apart) and sewed a seam to finish the edges.

Next, I pinned the front piece and the back pieces right sides together and sewed them together on all sides. (Note: when you pin the back pieces on, they will overlap each other in the middle of the pillow. This is how you stuff in your pillow form and hide it.)

Once sewn, turn the pillow case right side out. Make sure to get in those corners good! Stuff in your pillow form. Finally, I used fabric glue to attach the felt embellishments. I thought about hand sewing them, but I didn't want any stitches to show (plus I'm lazy!). I put the glue directly on the felt, positioned it on my pillow and pushed the felt down really hard. Then I pinned it and left the pins in for a couple of hours.

Did I confuse you with this pictureless tutorial yet? If I did, please let me know. I am planning on doing some more of these soon, so if need be I can take pics to stick in here as I go. But for now, you'll have to settle for pics of more completed pillows:


The one below is my favorite. I used red burlap (you should also note I did fringed edges on this one by not turning it inside out and unraveling the edges up to the seam). *squee!* I think I'm addicted!


Here's a picture of the back of one so you can see what I mean when I'm describing it:

I managed to get all three pillows done in a relatively short amount of time-probably about 2 1/2 hours or so, not including glue drying time. Also, I think this is the first sewing project ever where I didn't have to break out the seam ripper (knock on wood!). Which is good, considering I'm not sure the burlap wouldn't have started to unravel. These would make great gifts and are inexpensive, since I used recycled pillow forms and burlap is cheap. All the felt appliques were 2 for $1 at the Dollar Tree.

What have you done with burlap? Let us know in the comments!

Happy Crafting!

*Sharing this at:

the Inspired Room's Holiday Linky Friday

Today's Creative Blog: Get your Craft On

Homebody's Thrifty Gifty

Infarrantly Creative's Pennywise Presents

Inspiration Thursday: DIY Christmas

For this inspiration post, I thought I would show you some great Christmas projects that you can do yourself.

First up is a couple of ideas from Better Homes and Gardens . This funky project uses up those big, old Christmas light bulbs:
Learn how to make them here.

Minimal sewing is required on these mini appliqued pillow ornaments thanks to fusible web!

Instructions found here.

Here's a couple of ideas from Country Living. (Can ya tell what magazines I get?). I love this take on the advent calendar using matchboxes:

Learn to make it here.

Or how about making these adorable snowflake pillows?

Instructions here.

Looking for an alternative door wreath? Check out what Rebecca did over at Blue Cricket Design!

What a great idea!

And last but not least, check out the amazing faux gumball machines over at See Jane Blog:

And yes, she has a tutorial here!

Whew! With all this great inspiration, I'd better get cracking on the Christmas crafting! (Holy alliteration Batman!)

Happy Crafting!

Tuesday, December 1, 2009

I love scrapbooking paper!

Scrapbooking paper has so many great uses. You can make just about anything great with cute patterned paper and mod podge! I went crazy recently with some Christmas themed paper. Here's some of the stuff I've made.


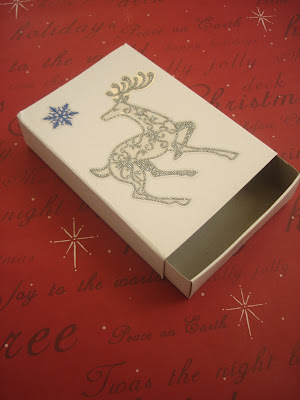
Cute "match box" gift boxes:


Didn't those turn out great? They are the perfect size for gift cards or jewelry.

Don't forget that cute Santa sign I made last week with some of the same paper. Here's a better picture of that:

You may be thinking right now, what's with all the pictures? I thought her camera was broken? It still is, but the sun was shining enough I was able to snap these quick over the noon hour yesterday. I can't wait until that new camera gets here!
What do you use scrapbooking paper for?
Happy Crafting!

*shared over at:

LinkWithin

Blog Widget by LinkWithin