Showing posts with label tutorial. Show all posts

Wednesday, June 9, 2010

Great Baby (Stuff) Making Tutorials

I didn't mean that title exactly as it sounds. Long before I had our little pumpkin, I started looking for tutorials on making crafts for babies. I ended up using quite a few and have quite a few more stored up and ready to make (as soon as I find and unpack my crafting supplies). I thought I would share some of my favorite ones.

Crib sheets seem like such a racket. They run anywhere from $7-$10 in the store (and that's for the cheap ones!) It's much less expensive to purchase 2 yards of fabric and sew them yourself. This tutorial from Made makes it so simple, even a novice sewer can make them! I made three different sheets from soft cotton flannel.


This next one is definately on my to do list: tights for the baby. I found a tutorial over on Made by Rae that I would love to try!


If you've been around the craft blog world at all, you've seen dozens of tutorials on how to make baby legs. This one from Everything your Momma Made & More seems fairly simple. This one is still on my to-do list.

Here's a great idea: using fabric to make "wallpaper" to decorate the baby's room. This is a good alternative to expensive vinyl graphics. Infarrantly Creative shows you how to do this here.

The best part? When you get tired of it, You just spray the wall lightly with water and it peels right off!

There are many different tutorials for customizing onesies out there. One of my favorites is this one from Not So Idle Hands. The reason I like this one so much is it uses a "cheat" to do screen printing. I've wanted to screen print for a really long time, but getting started is so expensive. This method uses inexpensive materials that every one can find.

There's also a tutorial for baby legs there.

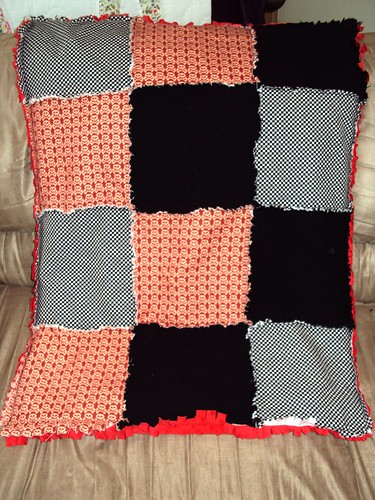
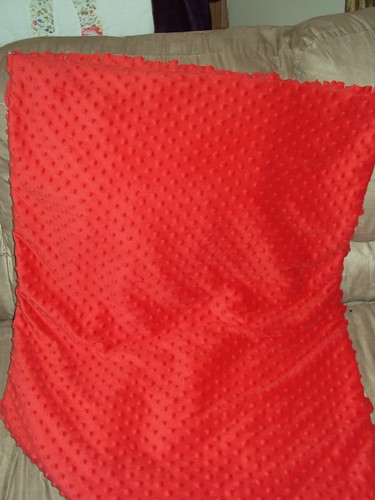
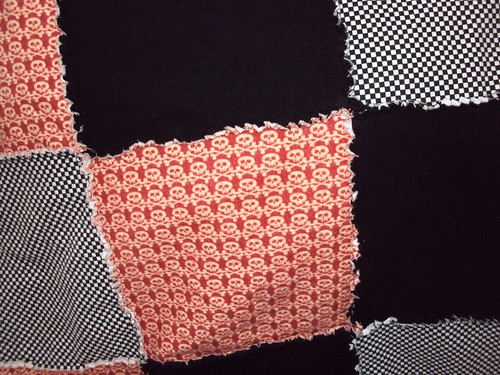
One last tutorial: a rag quilt. I made one of these in my boy color scheme. Now of course, I didn't have a boy, but I will use as a gift for the next time I have to give a boy baby gift. Here's a good, easy to follow tutorial for one on Oopsey Daisy.There are of course, many more tutorials out there for making baby stuff. These are just a few that I've found and liked. Have any great baby (stuff) making tutorials? ;) Please share in the comments.

Happy Crafting!

Wednesday, February 17, 2010

Quickie Project of the Week: Book Page Frame

I decided to make the project I finished on Sunday the quickie project of the week. It took me a little longer than the usual quickie (30 minutes). I spent about an hour on this project. But some of that was due to not being in a hurry (a.ka. watching t.v. while crafting) and drying time between coats.

We've all seen the book page wreaths (and if you haven't check out Living with Lindsay's tutorial). I found this paper mache frame at the thrift store and thought it would look great Mod Podged with book pages. I think this would work nice on any wide frame.

Supplies:
Frame of any kind
Old book (we are ripping pages here, so don't use a good one!)
Mod Podge
Acrylic Paint (optional)

Here's what I started with:
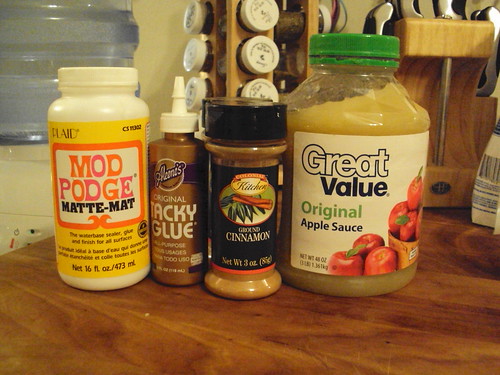
I used a foam brush to spread Mod Podge over a section of the frame. Then I took my book pages (already torn from the book and then torn in half) and started laying them on the frame. It may requires some smoothing out, depending on your frame. I also ripped some of the pages into smaller chunks and laid them on top for a more pieced look. Here's an in progress shot:


I also alternated the way I laid down the pages so the words were facing different directions to provide a bit more visual interest.

After I got the frame completely covered and let it dry a bit, I put another coat of Mod Podge over the whole thing and let it dry. When that was done, I decided it needed a bit of color. You might look at yours and decide it's perfect the way it is. That's why this next step is optional.
I took acrylic paint (barn red) and dry brushed it over the top of the frame (dry brushing is just taking most of the paint off the brush on a scrap before putting it on the actual piece). Here it is drying:
All Done!

This project turned out great! I might have to make more of these and do a display wall. This frame would look great with a picture in it or empty. In fact, a display wall of empty frames decorated like this would be fab!
Happy Crafting!

Friday, February 12, 2010

Baby Blanket #1 Finally Finished!

Okay, so I've been promising to show you this for awhile now and I'm just getting to it. Sorry! I can only hope that showing you now makes up for it. I mentioned awhile ago that I was working on a blanket in my boy color scheme (black, red and white). I struggled a bit with the last seam on it, but I finally finished it today. It's a rag quilt. I loosely (very) followed a tutorial like this. (I can't find the exact one I used anymore.) Here's the final result:

Skull rag quilt front

(I just realized how narrow it looks in this pic. It is not that narrow, just my ugly camera skill rearing its head again!) I love how this turned out! I didn't follow the tutorial exactly in that I just used one large piece of batting in the middle and one piece of red minky for the back. I tacked the batting to the front piece before sewing on the back. Here's what the back looks like:

Skull rag quilt back

Here's a close-up of the front so you can see the "rag" seams and the fabric:

Skull rag quilt closeup

All the squares are cotton flannel. I used natural cotton batting for the middle and minky (blend) for the back. Once I was done sewing everything together, I washed and dried it to get the rag look on the seams. I kinda wish I would've sewn it together with individual squares on the back as well, but live and learn I guess.

This turned out so cute! I can't wait to get started on my next project! (Again, going overboard and getting ahead of myself here!) I bought this Michael Miller panel:

Michael Miller panel

It's from the "At First Sight" line. I'm not sure if I'm going to do another blanket, or something else entirely with it. If I do make a blanket, it's just going to be a lightweight one without any lining/batting in the middle. What do you think I should use it for?

Happy Crafting!

Tuesday, December 15, 2009

Cinnamon Dough Ornaments

I tried my hand at cinnamon dough ornaments last night. They look just like gingerbread and smell delicious!

I used Martha Stewart's recipe found here. It calls for:


  1. 1 cup ground cinnamon
  2. 1/4 applesauce
  3. 1/2 cup of craft glue

First, you measure out and mix the cinnamon and the applesauce (I ended up adding a couple of tablespoons more applesauce to get a consistency I liked). Then you add the craft glue. I didn't want to use up all of any one given glue, so I used a 1/4 cup of tacky glue and a 1/4 of Mod Podge. Martha's instructions say to let the dough sit an hour. I'm impatient and was worried about the glue getting too dry, so I only let my sit 30 minutes or so. Here's what the dough will look like:

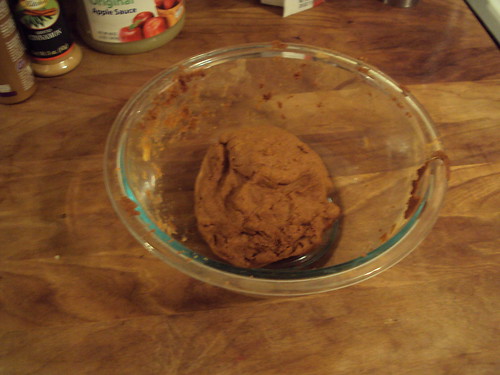
After you let it sit a bit, take a small hunk of the dough (about 1/4) and roll it out with your rolling pin. Here's some tips for working with the dough:
  1. If it gets dry and starts cracking, sprinkle it with a little tiny bit of water. This helps smooth the dough.
  2. Use dry cinnamon like you would flour when rolling out cookies. it keeps the dough from sticking to your rolling pin.
  3. Don't be afraid to add a little extra applesauce if the consistency of the dough is too tough. Just make sure it gets mixed in really well.

Once your dough is rolled out, you can use cookie cutters to cut out shapes, or like Martha Stewart, you could print out templates on card stock and use a knife to cut around them. I did both. Don't forget to poke a hole for hanging the ornaments. I used a straw for the bigger ones and a small pastry bag tip for the little ones.


Here's the "cookies" drying on a rack. You are supposed to let them air dry for 24 hours, flipping them over every 6 hours or so. Or you can bake them at 200 degrees for about 2 hours, flipping once about half-way through.

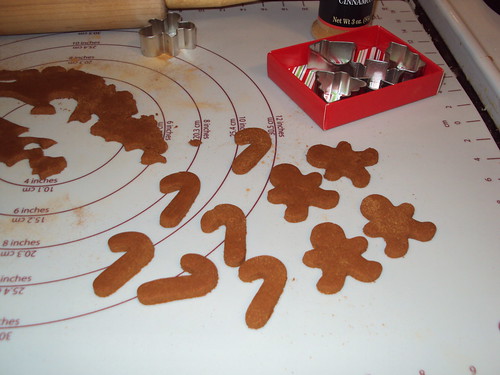
Mine are still drying, so no finished pics yet. I will update this post when I'm able to get them decorated. Martha glittered her bird shapes. I want mine to still look like gingerbread, so I'm planning on using paint pens, puff paint and things like that to decorate them. I plan to put the small ornaments on my little kitchen Christmas tree. I'm so excited to finish these! If you try these, please show us pics!

*Update: I decorating the dried ornaments mostly using fabric puff paint. It worked great! Here's some of my favorite:


Happy Crafting!


Sharing this at:


DIY Day @ ASPTL

The DIY Show Off

Wednesday, December 9, 2009

Quickie Project of the Week: Snow Ball Ornaments

Remember awhile ago, when I was going to post a quick, easy project every week that takes less than half an hour? And remember how I only did one of those posts? I know I'm bad at these weekly installment type posts, but one of my New Year's Resolutions is to manage this blog better, so I thought I'd get an early start. Okay, enough rambling, on to the project!

This week's quickie project is Snow Ball Ornaments:

The idea came to me when I saw all those cute snow crusted candles everyone in blogland was making with epsom salts. I always make personalized ornaments for every family on hubby's side and thought this would translate well.

Here's the needed supplies:

I took a clear glass bulb:


Put some Mod Podge on the bottom using a paint brush. You can do as little or as much as you want here. I wanted to be able to put stuff inside the ornament and still be able to see it, so I only did the bottom third or so:

Dip the ornament in a bowl full of epsom salts:

Shake off the excess and stick it upside down in something to dry!

Tada! Each ornament takes less than a minute to do. I did an entire box of nine in 10 minutes or so. I'm not completely done with mine yet (I wanted to let the Mod Podge dry thoroughly). I plan on either drawing initials on them with paint pens or using vinyl letters to say "Let it Snow" on them. I haven't decided which yet. Any thoughts?

I think this would also probably look great with colored glass balls as well, especially red ones! I'll show you mine when I get them all the way finished. Link up yours if you make some, I'd love to see them!
Happy Crafting!
*Sharing this at:
BCD Show and tell

Friday, December 4, 2009

Burlap Snowflake Tutorial

Okay, I still don't have a new camera yet, so you're going to have to bear with my crappy pictures. I was so excited to share this that I couldn't wait. I saw somewhere on blogland a tutorial for newspaper snowflakes. I was going to make those, but then the burlap post yesterday got me thinking. Why not make them with burlap?


So I give you: Recycled Burlap Snowflake Ornaments!


Here's mostly what you need for supplies:

  1. A snowflake template (printed mine off the internet onto card stock)
  2. Mod Podge
  3. Paintbrush
  4. Cardboard (in this case recycled from the back of an empty legal pad)
  5. Scissors
  6. Burlap scrap (or any fabric would work really)
  7. Buttons or other embellishment (not pictured)
  8. Glue gun (not pictured)

First: trace your snowflake pattern onto the cardboard:

(sorry for that horrible pic!)

Next, flip over your cardboard and brush mod podge over the back side of the cardboard (so you don't cover your traced lines). Make sure you put on a fairly thick coat so the burlap will stick good!

Then put your piece of burlap over the mod podge, smoothing it as you go.

Now comes the hard part, waiting for it to dry (at least that's the hard part for me!).

After it's dried for at least 10 minutes (15 would be best), turn over your cardboard and cut out your snowflake along the traced lines.


You could just leave this as it is, but I decided to put some buttons on mine with the hot glue gun (yea instant gratification!)

Then I punched a hole in the snowflake with a regular hole punch and tied a natural cotton string through the hole. You could use twine or ribbon for this too, I didn't have any twine! :(

TaDa! You're done!


Wouldn't a bunch of these look great on a rustic themed tree? Or as a great handmade package topper? You could do any shape you wanted, don't limit your imagination to snowflakes. I can see these as deer, trees, the sky's the limit!

Also, you could probably eliminate the need for cardboard by treating the burlap with fabric stiffener and then tracing and cutting your pattern directly from that. I haven't tried this method, so I can't guarantee the burlap won't unravel at the edges.

Let me know if you try this project! I'd love to see your version.

Happy Crafting!


*P.S. Two tutes in two days, I am on a roll! ;)

*Sharing this at:

The Inspired Room's Holiday Linky Friday

Today's Creative Blog: Get your Craft On

A Soft Place to Land's Do it Yourself Day

Thursday, December 3, 2009

I Bit the Burlap Bullet

So, everyone in the online crafting world has been going nuts over burlap. I've refrained from doing so for quite some time...but alas, Christmas got the better of me. My mom gave me a huge pile of pillow forms last time I was home. I also acquired some really cute felt shapes from various places like the Dollar Tree and Target. The fabric that brought all these things together nicely was (you guessed it!) burlap. These were super simple to make, and I have to admit, they turned out great!
Some (mis) guidance:

For each pillow, I just measured one side of the pillow form (from side seam to side seam) and added 1/2 inch total (for 1/4 seam allowance on each side) all the way around. Then I cut one square for the front using that measurement. (Ex. the pillow form measures 15 inches, so I cut a square 15 1/2 x 15 1/2 inches.)

For the back, I did an envelope style so I could change out the cover if I wanted. For these pieces, I kinda eyeballed it, but it basically ended up being the same measurements as the front plus two inches or so on one side only. (in our example, this would be 15 1/2 inches tall by 17 1/2 inches wide.) Then I cut this rectangle in half, starting on one of the wider sides (17 1/2 inches) Then I folded under a 1/4 inch on each half (where you just cut the two apart) and sewed a seam to finish the edges.

Next, I pinned the front piece and the back pieces right sides together and sewed them together on all sides. (Note: when you pin the back pieces on, they will overlap each other in the middle of the pillow. This is how you stuff in your pillow form and hide it.)

Once sewn, turn the pillow case right side out. Make sure to get in those corners good! Stuff in your pillow form. Finally, I used fabric glue to attach the felt embellishments. I thought about hand sewing them, but I didn't want any stitches to show (plus I'm lazy!). I put the glue directly on the felt, positioned it on my pillow and pushed the felt down really hard. Then I pinned it and left the pins in for a couple of hours.

Did I confuse you with this pictureless tutorial yet? If I did, please let me know. I am planning on doing some more of these soon, so if need be I can take pics to stick in here as I go. But for now, you'll have to settle for pics of more completed pillows:


The one below is my favorite. I used red burlap (you should also note I did fringed edges on this one by not turning it inside out and unraveling the edges up to the seam). *squee!* I think I'm addicted!


Here's a picture of the back of one so you can see what I mean when I'm describing it:

I managed to get all three pillows done in a relatively short amount of time-probably about 2 1/2 hours or so, not including glue drying time. Also, I think this is the first sewing project ever where I didn't have to break out the seam ripper (knock on wood!). Which is good, considering I'm not sure the burlap wouldn't have started to unravel. These would make great gifts and are inexpensive, since I used recycled pillow forms and burlap is cheap. All the felt appliques were 2 for $1 at the Dollar Tree.

What have you done with burlap? Let us know in the comments!

Happy Crafting!

*Sharing this at:

the Inspired Room's Holiday Linky Friday

Today's Creative Blog: Get your Craft On

Homebody's Thrifty Gifty

Infarrantly Creative's Pennywise Presents

Inspiration Thursday: DIY Christmas

For this inspiration post, I thought I would show you some great Christmas projects that you can do yourself.

First up is a couple of ideas from Better Homes and Gardens . This funky project uses up those big, old Christmas light bulbs:
Learn how to make them here.

Minimal sewing is required on these mini appliqued pillow ornaments thanks to fusible web!

Instructions found here.

Here's a couple of ideas from Country Living. (Can ya tell what magazines I get?). I love this take on the advent calendar using matchboxes:

Learn to make it here.

Or how about making these adorable snowflake pillows?

Instructions here.

Looking for an alternative door wreath? Check out what Rebecca did over at Blue Cricket Design!

What a great idea!

And last but not least, check out the amazing faux gumball machines over at See Jane Blog:

And yes, she has a tutorial here!

Whew! With all this great inspiration, I'd better get cracking on the Christmas crafting! (Holy alliteration Batman!)

Happy Crafting!

Thursday, November 5, 2009

Quick, Easy Tutorials for Christmas Gifts


I am slowly starting to go toward a handmade Christmas. (Of course the nieces and nephew don't count toward this, mostly because my hubby spoils them and gives them whatever commercial item they want.) ;) I thought I'd share with everyone a list of some quick, easy tutorials that I've found that make great Christmas gifts.


  1. Tile Coasters

  2. Cinnamon Bird Ornaments

  3. Make your own reed diffuser

  4. Felted Soap

  5. Button Ornament/Package topper

  6. Body Scrubs

I hope these tutorials help you get a head start on your handmade Christmas gifts this year!


Happy Crafting!

*Image from The Graphics Fairy

Friday, October 23, 2009

What the heck's going on around here?

So...if you visited my blog at all today, you may have noticed some weird looking stuff for awhile. It was just me, trying to figure out html code. Yikes! That's scary folks! I am pretty clueless when it comes to computer stuff, but luckily for me, I have two saviors in that department, my husband and the internet. This time it was the internet that saved me. I have been wanting to do three columns on this blog foreva! Finally today, I googled a way to do that. I found this blog called Blogger Buster. It has amazingly simple step-by-step instructions for how to change things if you use Blogger as your platform. It took me seriously five minutes to change this bad boy from two regular columns into three awesome looking ones. I am planning on changing the look of my background and header soon as well...watch for the unveiling of the new look of Hindrance! (Here's the direct link to the 3 column tut if anyone is interested.)

Happy Crafting!

Wednesday, September 30, 2009

Old Microwave Stand Redo

So I was a busy beaver last weekend. Not that I actually got any cleaning or baking done like I planned, but I got lots of other stuff done. ;) The project that took me most of the weekend was a rehab of an old microwave stand. I am trying to actually clean and organize my craft room (porch) so that all the jewelry stuff is together, all the paint, etc. This stand sits in my craft room and is great for doing projects on since it has a drop leaf on it. (My mom gave me this for free. Woot!)


Here's the before:


And one with the leaf up:


Pretty ugly, eh? I was originally going to paint it an off-white, distress it and antique it, but at Junk Bonanza (see posts here and here), I saw several pieces that had been painted turquoise and distressed and antiqued, so I decided to go for it.

First I removed the hardware from the drawers. Then I sanded the whole piece with a palm sander. Then I painted the whole thing with cheap but effective paint from Walmart (Color Place: I believe the color was just called turquoise, I'll check and get back to you).

Here's what it looked like with a coat of paint:


Whew, that's bright! But don't worry, I'm not done yet! I took a piece of sandpaper and hand-sanded all the edges so they looked like this:

Then I took a foam brush and brushed on a dark walnut stain we had leftover in the garage. I put on the stain in small sections and then wiped it in circular motions with a rag. I did this over the whole piece and then let it dry. I didn't like the way it looked (still too bright), so I decided to brush on another coat with a bristle brush and just work it into the wood with the brush alone. This worked much better! To show you the difference, I took a pic of two drawer fronts. The bottom one is the one done with a rag wipe, the top one is after I used a bristle brush. Huge difference!


You can also see I spray painted the hardware with a hammered bronze spray paint (Rustoleum brand). When I put on the second coat of stain, I did it right over the hardware too. I think it helped it look much more aged.


Here's the finished product:


(Ignore the still messy craft porch. That's the cleaning I didn't get to this weekend.)

I love the result! That walnut stain definitely darkened up the turquoise paint a lot!!! What do you guys think? The whole project cost around $4. The only thing I bought was the half gallon of paint and I only used about half the can. I'm thinking now I might have to paint my tall freestanding cupboard in the craft room the same color!


* I plan on posting this tomorrow over at Shabby Chic Cottage for Transformation Thursday.

*Also linking up over at Infarrantly Creative's Roadkill Rescue Party!


Happy Crafting!

LinkWithin

Blog Widget by LinkWithin